みなさんこんばんは(・ω・)/ Sayaminです:*:・( ̄∀ ̄)・:*:
I've always wanted to do an easy & simple natural 'BabyDoll' eye-make tutorial (perfect for starters or if you are in a hurry), where you can achieve those really big dolly eyes but still keeping it more natural and refined. It's great for everyday use, or in situations that requires more natural eye-make.
♫ This tutorial does not include false eyelashes(付けまつげ➔つけま), BUT if you want to use つけま, then I will do some recommendation of what lashes that fits the best for this look, which will be in the end of this tutorial.♫
♫This is a Eye-make tutorial, so I will not be focusing on the base make-up and lips, but for those who are curious, I will write down what I've used for that part.♫
B A S E
Used products:
Step.2.
Step.3.
CHANEL: Perfection Lumière Foundation,
<10 Beige>, SPF 10 &
Baviphat BB cream (Magic girls edition, Oil-free)
Step.4.
E Y E M A K E
Used products:
Step 1: The EYESHADOW
♫ First, I used a light shimmery pink as a base from my Canmake 'Shiny Eyes'.
♫ To give the illusion of a bigger eye, I used a matte medium brown (from Rimmel london)on 2/3 of my upper eyelid (see picture). It is important to extent the line from the corner of the eyes!
By using a matte brown without shimmery, you'll make it look more natural
Sideview:
♫ I used the same matte brown for the outer part of the eye (also only 2/3) (See picture)
STEP 2: The EYELINERS
♫ To create more depth, I used Dollywink EyePencil Brown, on the same place where I used the matte eyeshadow on my upper eyelid.
♫ I now use a liquid eyeliner (LoveLiner) in brown and will repeat the last step. BUT this time, extend the eyeliner even further away from the corner of your eyes, and create a little 'wing' at the end. Also, make sure that the line isn't too thick.
Closed:
don't know why the eyeliner
came out black on the picture O_o
Open:
STEP 3: The MASCARA
♫ I first use the Dollywink LONG mascara. Start with the top of you eyelashes, using the end of the mascara brush. After that, do it as you please.
♫ Now use the Dollywink Volume to thicken your lashes.
♫ When you're finished, put a little bit of the Dollywink LONG mascara on your buttom lashes. Be careful not to make it too clumpy.
L I P S
Used products:
Step 1
Candydoll Lipstick (Ramune Pink)
Step 2
Candydoll Lipgloss (Strawberry Milk)
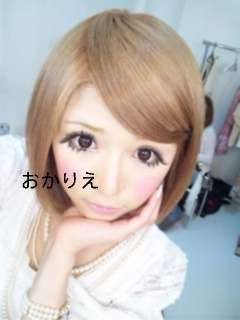
FINAL RESULT:
OPTIONAL:E Y E L A S H E S♫ NOTE: As you might know, every kind of lashes creates a specific effect to your eyes -such asタレ目、マル目、ネコ目ect.ect. So depending on what lashes you are using, the end result will look slightly different. ♫
If you want to use false eyelashes/つけま on this look, I strongly recommend using more natural ones (like Kumikki). It would look stunning with upper- and under lashes such as:
Jümily Eyes
(by: Takahashi Maiko/高橋真依子/Maichi, Model)
NailNail, D.U.P Eyelashes
"Maigawa Aiku BROWN Selection"
(by: Maigawa Aiku, model)
Dollywink
"Mature Retro-kawaii lashes" -New series
(by: Masuwaka Tsubasa/益若つばさ, designer & model)
Jewerich
Their new colors & styles
(by: S Cawaii models)
And also...
。O○ ・:*。:゚HAPPY NEW YEAR EVERYONE○:.。・:*:・゚
++U*´∀`ァアアケオメエエェ´∀`*U++
☆ことょろ!!\(^0^)/
♡ Sayamin ♡


 イェイ
イェイ

 (笑
(笑


